Master the Art of Farming in Stardew Valley
Have you ever dreamed of turning a simple field into a thriving farm? In Stardew Valley, farming is the key to creating your own successful agricultural empire. This guide will help you learn the ins and outs of farming mechanics, from planting your first parsnips to choosing the best crops for big profits. You'll discover tips on how to optimize your farm and make the most of your harvests. Whether you're a beginner or looking to improve your skills, this comprehensive resource will give you everything you need to become a farming expert in Stardew Valley!
Farming Basics: Tools, Soil, and Watering
Before you can grow anything, you need to understand the fundamental mechanics of farming in Stardew Valley. These basics will serve as your foundation for agricultural success.
Essential Farming Tools
The Hoe: Your primary tool for tilling soil. Each use creates one farmable tile where you can plant seeds. Upgrading your hoe allows you to till multiple tiles at once:
- Basic Hoe: 1 tile
- Copper Hoe: 3 tiles (in a line)
- Steel Hoe: 5 tiles (in a line)
- Gold Hoe: 9 tiles (3x3 area)
- Iridium Hoe: 18 tiles (6x3 area)
The Watering Can: Essential for daily crop maintenance. Plants need water every day (except rainy days) to grow. Upgrading increases capacity and coverage:
- Basic Can: 40 uses, 1 tile
- Copper Can: 55 uses, 3 tiles (in a line)
- Steel Can: 70 uses, 5 tiles (in a line)
- Gold Can: 85 uses, 9 tiles (3x3 area)
- Iridium Can: 100 uses, 18 tiles (6x3 area)
The Scythe: Harvests crops, cuts grass, and clears weeds. Unlike other tools, it uses no energy - perfect for clearing your farm. For comprehensive energy-saving strategies and stamina management, check out our energy management guide.
Understanding Soil Quality
Not all dirt is created equal in Stardew Valley:
- Regular Tilled Soil: Basic farming tiles created with your hoe
- Fertilized Soil: Increases crop quality chances (Basic, Quality, Deluxe fertilizers)
- Speed-Gro Soil: Reduces growth time by 10% (regular) or 25% (Deluxe)
- Retain Soil: Keeps soil watered longer, reducing daily watering needs
Pro Tip: Always fertilize before planting! You can't add fertilizer after seeds are planted.
The Watering Cycle
Successful farming revolves around efficient watering:
- Water crops first thing each morning (6 AM)
- Check weather TV - skip watering if rain is forecast
- Crops stay watered through the night
- Dead crops result from missing a single watering day
- Sprinklers automate this process entirely
Seasonal Crop Planning for Maximum Profit
Each season offers unique crops with different growth times and profit margins. Strategic planning ensures continuous harvests and maximum income.
Spring Crop Strategy
Top Spring Performers:
- Strawberries (Day 13 at Egg Festival)
- Cost: 100g | Sell: 120g+ | Growth: 8 days, then every 4 days
- ROI: 20g+ per harvest × multiple harvests = massive profits
- Cauliflower
- Cost: 80g | Sell: 175g | Growth: 12 days
- Profit: 95g per crop | Can form giant crops
- Potatoes
- Cost: 50g | Sell: 80g | Growth: 6 days
- Profit: 30g | Chance for multiple potatoes per harvest
- Kale
- Cost: 70g | Sell: 110g | Growth: 6 days
- Profit: 40g | Great for Preserve Jars
Spring Planning Tips:
- Plant Parsnips Day 1 for quick early cash
- Save 3,000g+ for Strawberry seeds at Egg Festival
- Reserve space for Cauliflower's 12-day growth
- Mix fast (Potatoes) and slow (Cauliflower) crops
Summer Crop Domination
Summer Money Makers:
- Blueberries - The Summer King
- Cost: 80g | Sell: 50g+ per berry (3 per harvest) | Growth: 13 days, then every 4 days
- Profit: Minimum 70g per harvest × 4+ harvests = 280g+ total
- Starfruit (Desert/Seed Maker)
- Cost: 400g | Sell: 750g | Growth: 13 days
- Profit: 350g | Best for Artisan processing
- Melons
- Cost: 80g | Sell: 250g | Growth: 12 days
- Profit: 170g | Can form giant crops
- Hot Peppers
- Cost: 40g | Sell: 40g+ | Growth: 5 days, then every 3 days
- Continuous harvest for gifts/cooking
Summer Optimization:
- Plant Blueberries on Summer 1 for maximum harvests
- Dedicate 50%+ of farm to Blueberries
- Use Quality Fertilizer for higher-value berries
- Save Starfruit for Wine/Jelly production
- Learn which crops are most profitable in our best crops guide
Fall Harvest Fortune
Fall Profit Champions:
- Cranberries - The Profit Monster
- Cost: 240g | Sell: 75g+ per berry (2 per harvest) | Growth: 7 days, then every 5 days
- Profit: 150g+ per harvest × 5 harvests = 750g+ total ROI
- Pumpkins
- Cost: 100g | Sell: 320g | Growth: 13 days
- Profit: 220g | Great for Pickles | Giant crop potential
- Artichokes
- Cost: 30g | Sell: 160g | Growth: 8 days
- Profit: 130g | Excellent processing value
- Sweet Gem Berries (Rare Seeds)
- Cost: 1,000g | Sell: 3,000g | Growth: 24 days
- Profit: 2,000g | Ultimate single-harvest crop
Fall Strategy:
- Plant Cranberries Day 1 - they're more profitable than any other crop
- Mix Pumpkins for processing into high-value Pickles
- Use greenhouse space for Sweet Gem Berries
- Prepare preserved/kegged goods for Winter income
Winter Alternatives
While outdoor farming stops, you still have options:
- Greenhouse: Grow any season's crops year-round
- Winter Seeds: Craft from foraged items
- Indoor Pots: Limited but viable for specific needs
- Processing: Turn stored crops into Artisan Goods
Farm Layout Optimization for Beginners
Efficient farm design maximizes space, minimizes walking, and streamlines daily tasks. Here's how to layout your farm for success.
Early Game Layout (Spring Year 1)
The 3x3 Plot System:
- Create multiple 3x3 crop plots
- Leave walking paths between plots
- Position near water source for easy can refills
- Keep plots small for manageable watering
Example Spring Layout:
[C][C][C]  [P][P][P]  [K][K][K]
[C][C][C]  [P][P][P]  [K][K][K]
[C][C][C]  [P][P][P]  [K][K][K]

C = Cauliflower, P = Potatoes, K = Kale
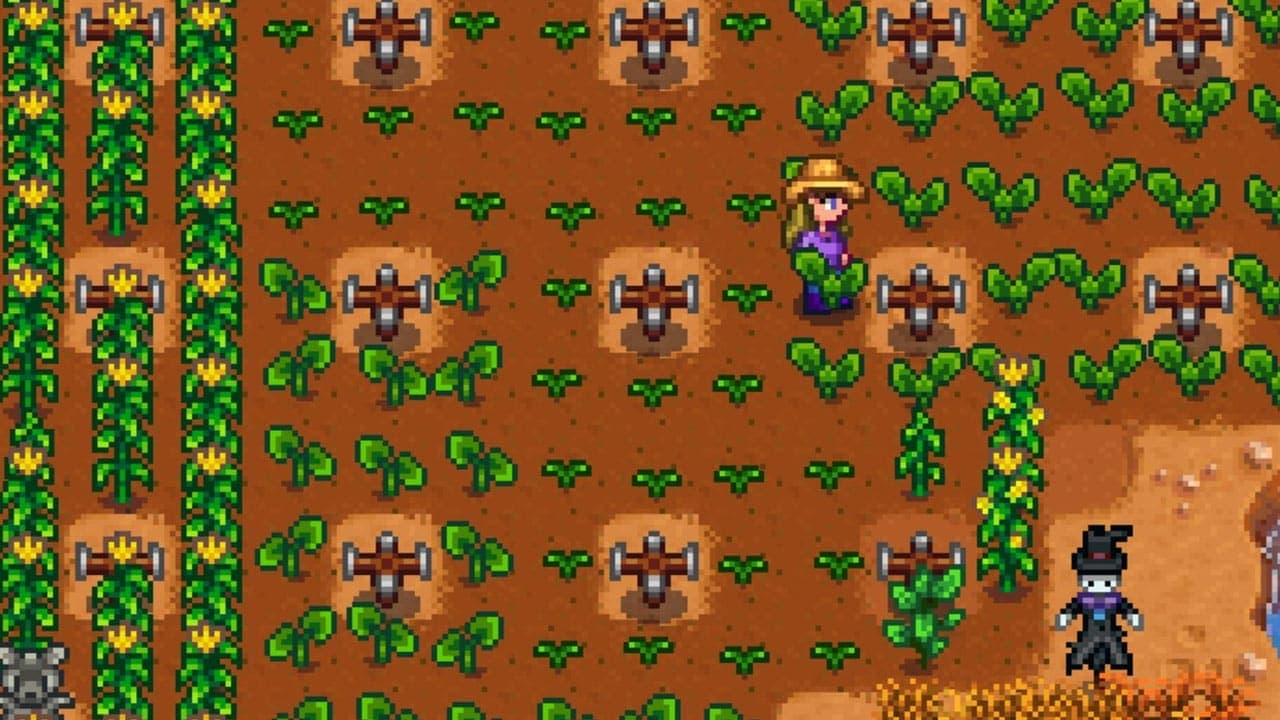
Mid-Game Sprinkler Layout
Quality Sprinkler Configuration (Covers 8 tiles):
[X][X][X]
[X][S][X]
[X][X][X]

S = Sprinkler, X = Watered tile
Optimal Sprinkler Farm Design:
- Create 3x3 grids with sprinklers in center
- Leave paths every 2-3 sprinkler sections
- Group crops by harvest date for efficiency
- Position scarecrows to cover maximum area (8-tile radius)
Advanced Iridium Sprinkler Layout
Iridium Sprinkler Coverage (24 tiles with pressure nozzle):
- 5x5 area coverage per sprinkler
- Allows for massive continuous fields
- Minimal path space needed
- Perfect for giant crop formation
Common Farming Mistakes That Cost Money
Avoid these costly errors that can devastate your profits:
1. Overplanting Without Infrastructure
Mistake: Planting more crops than you can water daily
Solution: Match crop count to watering can capacity and available time
Math: Basic can = 40 waters = 40 crops maximum without refills
2. Ignoring Crop Timing
Mistake: Planting 12-day crops on Summer 20
Solution: Count days remaining in season before planting
Tool: Check calendar and count growth days
3. Selling Raw Crops
Mistake: Selling crops directly instead of processing
Solution: Build Preserve Jars and Kegs for 2-3x value
Example: Pumpkin (320g) → Pumpkin Pickles (690g)
4. Poor Fertilizer Choices
Mistake: Using expensive fertilizer on cheap crops
Solution: Match fertilizer cost to crop value
Strategy: Quality Fertilizer on multi-harvest crops only
5. Neglecting Scarecrows
Mistake: Losing crops to crows
Solution: One scarecrow per 8-tile radius (248 tiles coverage)
Placement: Central positioning for maximum coverage
Scaling Your Farm: From Small Plot to Agricultural Empire
Growing your farming operation requires strategic planning and reinvestment. Here's your roadmap to agricultural dominance.
Phase 1: Survival (Spring Year 1)
- Focus: 15-30 crops maximum
- Goals: Generate 500-1,000g daily income
- Invest in: Backpack upgrade, better tools
- Key crops: Parsnips, Potatoes, Cauliflower
Phase 2: Expansion (Summer Year 1)
- Focus: 50-100 crops with first sprinklers
- Goals: 2,000-5,000g daily income
- Invest in: Quality Sprinklers, Preserve Jars
- Key crops: Blueberries dominate everything
Phase 3: Optimization (Fall Year 1)
- Focus: 100-200 crops, mostly automated
- Goals: 5,000-10,000g daily income
- Invest in: Kegs, more sprinklers, barn/coop
- Key crops: Cranberries, Pumpkins for processing
Phase 4: Empire (Year 2+)
- Focus: 300+ crops, full automation
- Goals: 20,000g+ daily income
- Invest in: Iridium Sprinklers, mass processing
- Key crops: Ancient Fruit, Starfruit, processing focus
Advanced Farming Techniques
Giant Crop Formation
Cauliflower, Melons, and Pumpkins can form giant crops:
- Plant in at least 3x3 formations
- Leave fully grown crops unharvested
- Each day has a 1% chance to form giant crop
- Giant crops yield 15-21 items when harvested
Crop Rotation Strategy
Maximize field usage with smart rotation:
- Fast crops (4-6 days) between slow crops
- Example: Radishes after Strawberries before Summer
- Always have something growing
- Process during growth downtime
Multi-Harvest Optimization
Crops that keep producing are incredibly valuable:
- Plant on Day 1 for maximum harvests
- Use Quality Fertilizer for all harvests to benefit
- Never till these crops mid-season
- Examples: Strawberries, Blueberries, Cranberries
Seasonal Profit Calculations
Understanding the numbers helps you make informed planting decisions:
Spring Profit Rankings (Per Tile)
- Strawberries: ~500g profit per season (with 2 harvests)
- Cauliflower: ~190g profit per season (2 harvests)
- Potatoes: ~150g profit per season (4 harvests)
- Kale: ~160g profit per season (4 harvests)
Summer Profit Rankings (Per Tile)
- Blueberries: ~880g profit per season
- Starfruit: ~350g profit (537g with Deluxe Speed-Gro)
- Melons: ~340g profit per season (2 harvests)
- Red Cabbage: ~393g profit per season (3 harvests)
Fall Profit Rankings (Per Tile)
- Sweet Gem Berry: ~2,000g profit (single harvest)
- Cranberries: ~1,101g profit per season
- Pumpkins: ~440g profit per season (2 harvests)
- Artichokes: ~520g profit per season (3 harvests)
Quick Reference: Farming Checklist
Daily Farming Tasks
- ☐ Check TV for weather
- ☐ Water all crops (skip if raining)
- ☐ Harvest ready crops
- ☐ Replant harvested spaces
- ☐ Process crops in Jars/Kegs
- ☐ Clear new farming space
Seasonal Transitions
- ☐ Count days remaining for current crops
- ☐ Buy next season's seeds in advance
- ☐ Harvest everything on Day 28
- ☐ Till and fertilize for Day 1 planting
- ☐ Stock up on fertilizer/speed-gro
Conclusion: Your Path to Farming Mastery
Farming in Stardew Valley rewards both careful planning and consistent execution. Start small with manageable plots, reinvest your profits wisely, and gradually automate with sprinklers. Remember that processing crops through Preserve Jars and Kegs multiplies your profits significantly.
Focus on high-value multi-harvest crops like Blueberries and Cranberries, optimize your farm layout for efficiency, and always plan ahead for seasonal transitions. With these strategies, you'll transform from a struggling farmer into Pelican Town's agricultural tycoon.
Most importantly, farming should be enjoyable. Don't stress about perfect optimization on your first playthrough - experiment, learn from mistakes, and find the farming style that brings you joy. The beauty of Stardew Valley is that there's no wrong way to farm, only more or less efficient methods. Happy farming!